To Remove Paint From Old Light Fixtures / Diy Easy Chandelier Makeover With Spray Paint In 1 Hour Lehman Lane - Wet a soft cloth and wring out the excess water, and then use the damp cloth to gently wipe away any paint residue.
Dapatkan link
Facebook
X
Pinterest
Email
Aplikasi Lainnya
To Remove Paint From Old Light Fixtures / Diy Easy Chandelier Makeover With Spray Paint In 1 Hour Lehman Lane - Wet a soft cloth and wring out the excess water, and then use the damp cloth to gently wipe away any paint residue.. If your glass is yellow. Let them dry for 15 minutes and then add another coat if needed. Easy trick to fix yellowed, ugly, smoke damaged or discolored glass globes and fixtures. In this bathroom remodel series, i'll show you how to remove hollywood light fixture above your vanity. Steps remove the painted brass fixtures from the door or window.
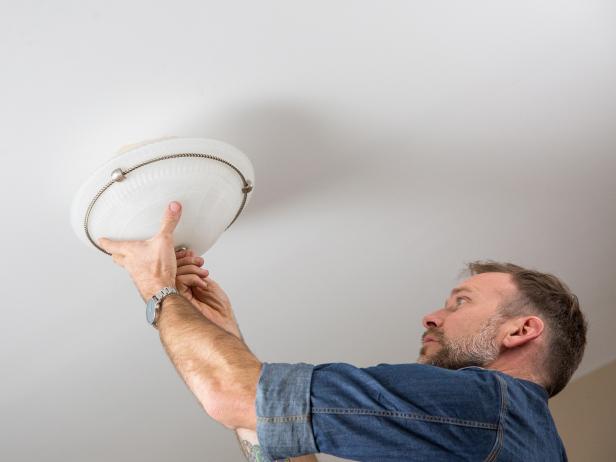
The light fixture, as is, was no longer working. If you have decided to remodel your plain, metal light fixtures by adding a coat of paint, you will have to contend with a few complications. For the hard paint spots, they need to forcefully rub the damp cloth over that area. Then scrub more forcefully to remove the paint. Use plastic tongs to remove hardware from the crockpot without scratching it.
How To Change A Light Fixture Hgtv from hgtvhome.sndimg.com Here it is before…(and the old wall paint color)… and here it is now… along with the new wall paint color. Here is the only thing you need! Lay them out flat on a piece of cardboard and lightly spray them with the same rustoleum universal metallics spray paint for the last diy light fixture update. Go slow, advises jane deimezis of appleton lighting. In this bathroom remodel series, i'll show you how to remove hollywood light fixture above your vanity. Scrub the surface area with your soaked cloth. I recently repainted the foyer in my favorite, sw sea salt and it totally changed the feel of the entry. Allow this to sit overnight and by morning the paint should be soft enough to wipe away with a soft clean cloth.
If your glass is yellow.
The next day, the paint will be soft and ready to fall off the metal. In this bathroom remodel series, i'll show you how to remove hollywood light fixture above your vanity. Lastly, the light fixture in the foyer. Once your paint is removed, you'll need to clean the brass off once more. Often, this will take about 5 minutes. If you notice that the paint isn't bubbling, drain the pan and then repeat the process with more boiling water to reheat the metal. They are easy and quick to remove and replace. There are several proven methods for removing paint from brass light fixtures. For every quart of water, add 1/4 cup of baking soda or vinegar and bring the water to a boil. If your glass is yellow. A careful touch and the right supplies can help you remove paint from a glass lily lampshade without damaging it. Step 1 place the fixtures in a crock pot with just enough water to cover them and set it on low. I first removed the bottom piece from my outdoor fixture:
There are several proven methods for removing paint from brass light fixtures. Let them dry for 15 minutes and then add another coat if needed. I promise you won't see the scratches after spray painting. Step 4 chemical soak (if needed) photo by eric piasecki. Sometimes you can just scrub the paint off with a scouring pad soaked in pine cleaner, but if that isn't enough, you can remove the board, put some pine cleaner in the tub, and give the trim a bath.
How Do I Strip Paint Off This Old Light Fixture Metalworking from external-preview.redd.it For every quart of water, add 1/4 cup of baking soda or vinegar and bring the water to a boil. Remove glass shades and set aside. Scrub the surface area with your soaked cloth. Allow this to sit overnight and by morning the paint should be soft enough to wipe away with a soft clean cloth. Here is the only thing you need! Let them dry for 15 minutes and then add another coat if needed. This is one of the lights beside my french doors upstairs. Use plastic tongs to remove hardware from the crockpot without scratching it.
Then scrub more forcefully to remove the paint.
For every quart of water, add 1/4 cup of baking soda or vinegar and bring the water to a boil. I first removed the bottom piece from my outdoor fixture: Turn off the light switch and breaker for the light. Step 4 chemical soak (if needed) photo by eric piasecki. This is one of the lights beside my french doors upstairs. Here is the only thing you need! They are easy and quick to remove and replace. Use plastic tongs to remove hardware from the crockpot without scratching it. If you notice that the paint isn't bubbling, drain the pan and then repeat the process with more boiling water to reheat the metal. I removed the glass globe, and sprayed the bottom piece with (affiliate link) oil rubbed bronze by rustoleum spray paint: Instead of replacing the hardware so it looks clean, how about cleaning off the old paint instead? Materials needed for painting light fixtures. Rinse the plates and the outlet with clean water and dry thoroughly before replacing the cover plate and turning the electricity back on.
Step 1 place the fixtures in a crock pot with just enough water to cover them and set it on low. A careful touch and the right supplies can help you remove paint from a glass lily lampshade without damaging it. Fill a basin with warm water and a few drops of mild detergent. Take a tack cloth or a clean, dry rag and remove all the dust, dirt, and debris from your fixture. For the hard paint spots, they need to forcefully rub the damp cloth over that area.
How To Recycle Light Fixtures Recyclenation from recyclenation.com If the fixture is steel, copper, or cast iron, do not use the soaking method to clean it. For the hard paint spots, they need to forcefully rub the damp cloth over that area. Take a tack cloth or a clean, dry rag and remove all the dust, dirt, and debris from your fixture. Scrub the surface area with your soaked cloth. This is one of the lights beside my french doors upstairs. Often, this will take about 5 minutes. The first coat will look sparse, but keep layering! Once your paint is removed, you'll need to clean the brass off once more.
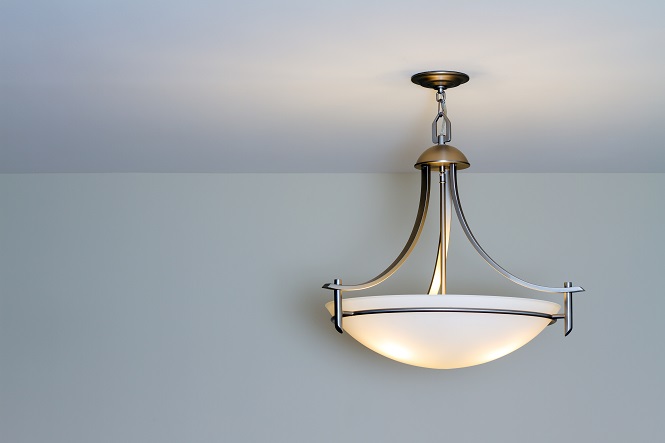
Lastly, the light fixture in the foyer.
The first coat will look sparse, but keep layering! Rinse the plates and the outlet with clean water and dry thoroughly before replacing the cover plate and turning the electricity back on. Wipe off the paint chips with a dampened cloth or sponge. Often, this will take about 5 minutes. While hot water is amazingly effective at removing paint from metal, it needs some time to work. Step 1 place the fixtures in a crock pot with just enough water to cover them and set it on low. If you have decided to remodel your plain, metal light fixtures by adding a coat of paint, you will have to contend with a few complications. The light fixture, as is, was no longer working. There are several proven methods for removing paint from brass light fixtures. Due to the heat generated by light bulbs, the paint may have baked onto the surface, which may make rubbing ineffective. Add the item to the pan and let it boil for about 15 minutes or until the paint falls off. Instead of replacing the hardware so it looks clean, how about cleaning off the old paint instead? I promise you won't see the scratches after spray painting.
*Pugilism PLATES NOT INCLUDED WITH Some OF OUR FRONT Finish KITS, YOU MUST SUPPLY YOUR OWN- THANKS SRP The following documents require Adobe Acrobat to be installed. Mustang II/Suspension system instructions: Universal Mustang II Assemblage Instructions (180 Kilobyte) Ecumenical 56" Crossmember Hub to Hub Set up (324 KB) Universal 60" Crossmember Hub to Hub Put in (3877 K) Universal proposition Sway Bar for Mustang II (330KB) Cross Member Gusset (46 KB) Mavel Unisteer One-half-Rack Install (209 KB) 1933 - 1934 Gerald Rudolph Ford Elevator car Exclusively Crossmember Kit 1934 - 1936 Chivvy Master Hub to Hub Set up (176 KB) 1934-1935 Chivy Standard Cross Kit Install Instructions 1935 - 1940 Fording Car Put in (247 KB...
Maruti Wagon R Service Schedule and Maintenance Costs in India. Review Wagon R Oil Change with Common Wear and Tear Items and Spare Parts in India Maruti Wagon R Service Cost Review Maruti Wagon R is the second best selling car in Indian market with a name for most spacious cabin in Segment, Huge reliability with one among best mileage and practical city car for Middle Class Family in India While both are known for low maintenance - Below are Service and Maintenance Costs of Maruti Wagon R:- Maruti Wagon R Service Schedule Oil & Filters ...
This tutorial will explain how to test the 1998-2003 3.9L V6 Dodge Dakota's ignition system to see if it's behind a misfire problem or a no-start problem. All of the tests are explained in a step-by-step manner. You'll be able to easily diagnose the following components: spark plug wires, distributor cap and rotor, and the ignition coil. You can find this tutorial in Spanish here: Cómo Probar El Sistema De Encendido (1998-2003 3.9L V6 Dodge Dakota) (at: autotecnico-online.com ). APPLIES TO: This tutorial applies to the following vehicles since they use the exact same ignition system components covered by this tutorial: 3.9L Dodge Dakota: 1998, 1999, 2000, 2001, 2002, 2003. 3.9L Dodge Durango: 1998, 1999. WIRING DIAGRAM: The following ignition system wiring diagrams will further ...


Komentar
Posting Komentar